
A quick introduction to Javafx technology for embedded developers who wish to create simple interfaces on PC to communicate with embedded devices like Arduino, GPS devices ,Relays, Data Acquisition Devices etc.
Here you will learn how to compile javafx GUI applications using command line tools on Windows.
This tutorial teaches the user to build cross platform GUI apps that runs on a desktop/laptop computer either Windows or Linux.
Introduction
JavaFX is a software platform from Oracle for creating and delivering desktop GUI applications that can run across a wide variety of devices and operating systems.
On desktops, JavaFX supports
- Windows Vista, Windows 7,Windows 8,Windows 10,Windows 11
- macOS
- and Linux operating systems.
Open-source JavaFX Ports works for iOS (iPhone and iPad) and Android and embedded (Raspberry Pi) are available from Gluon
JavaFX was included with JDK prior to JDK 11,Now it is released under the OpenJFX project.
JavaFX ports are maintained by GluonHq
JavaFx Downloads
- The JavaFX libraries can be downloaded from the Gluon website.
- Scene Builder for Drag and Drop JavaFX development can be downloaded from here.
- Java Development Kit (Oracle JDK)
Installing JavaFX on Windows
Here we will be building JavaFx application using JDK on command line without using any IDE like intellij ,Netbeans or Eclipse.
First thing to do is to setup javafx on your Windows System. For that
- Install Java Development Kit (JDK) on your Machine
- Go to Gluon website using the above link and download the Windows version of the javafx libraries.

- Unzip the libraries to a directory of your choosing.
To Compile a simple javafx application you have to use the following command
javac --module-path "Path to your javafx lib folder" --add-modules javafx.controls,javafx.fxml YourFile.java
To Run the compiled javafx application class you have to use the following command
java --module-path "Path to your javafx lib folder" --add-modules javafx.controls,javafx.fxml YourFile
Let's create a simple hello world program and save it as JavaFX_Stage.java in a directory.
import javafx.application.Application;
import javafx.stage.Stage;
public class JavaFX_Stage extends Application
{
  public static void main(String[] args)
  {
     System.out.println("Launching JavaFX");
     launch(args);
     System.out.println("Finished");
  }
  public void start(Stage stage)
  {
     stage.setTitle("Hello");
     stage.setWidth(500);
     stage.setHeight(500);
     stage.show();
  }
}
Compilation errors and issues
Make sure that you use the latest the Java Development Kit (JDK) and the latest JavaFX libraries to prevent class file version conflict.
When we were using JavaFX 21 and JDK 17,we received the following class file has wrong version conflict error as shown below
h:\JavaFXDev>javac --module-path H:\JavaFXDev\openjfx-21\javafx-sdk-21\lib --add-modules javafx.controls,javafx.fxml JavaFX_Stage.java
error: cannot access module-info
 bad class file: H:\JavaFXDev\openjfx-21\javafx-sdk-21\lib\javafx.fxml.jar(/module-info.class)
   class file has wrong version 61.0, should be 55.0
   Please remove or make sure it appears in the correct subdirectory of the classpath.
error: cannot access module-info
 bad class file: H:\JavaFXDev\openjfx-21\javafx-sdk-21\lib\javafx.controls.jar(/module-info.class)
   class file has wrong version 61.0, should be 55.0
   Please remove or make sure it appears in the correct subdirectory of the classpath.
2 errors
To rectify "class file has wrong version , should be " Please use the latest JDK (here JDK21) when compiling the JavaFX libraries on command line.
JavaFX library directory structure
In our case, we have downloaded the JavaFX library in the directory
H:\JavaFXDev as shown below.
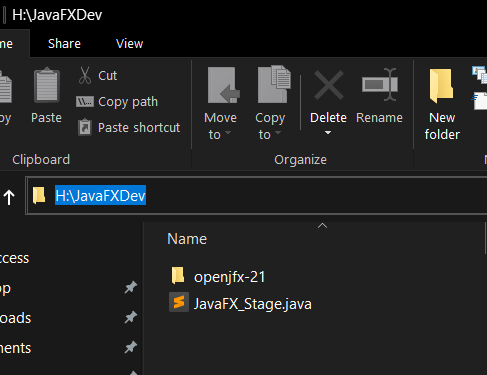
Here openjfx-21 contains javafx libraries.
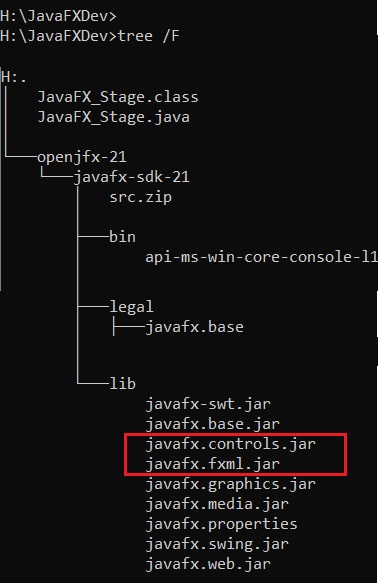
The directory structure is organized in the following way
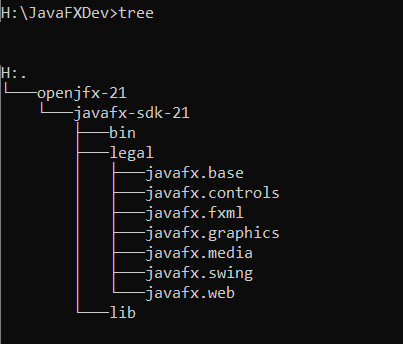
Here our code JavaFX_Stage.java is in the main directory H:\JavaFX_Stage.java
Compiling and running the JavaFx code on Windows
You can compile the code using the below command
javac --module-path H:\JavaFXDev\openjfx-21\javafx-sdk-21\lib --add-modules javafx.controls,javafx.fxml JavaFX_Stage.javaThen run the resulting class file using the below command
java --module-path H:\JavaFXDev\openjfx-21\javafx-sdk-21\lib --add-modules javafx.controls,javafx.fxml JavaFX_StageDon't include .class file extension while running the code.
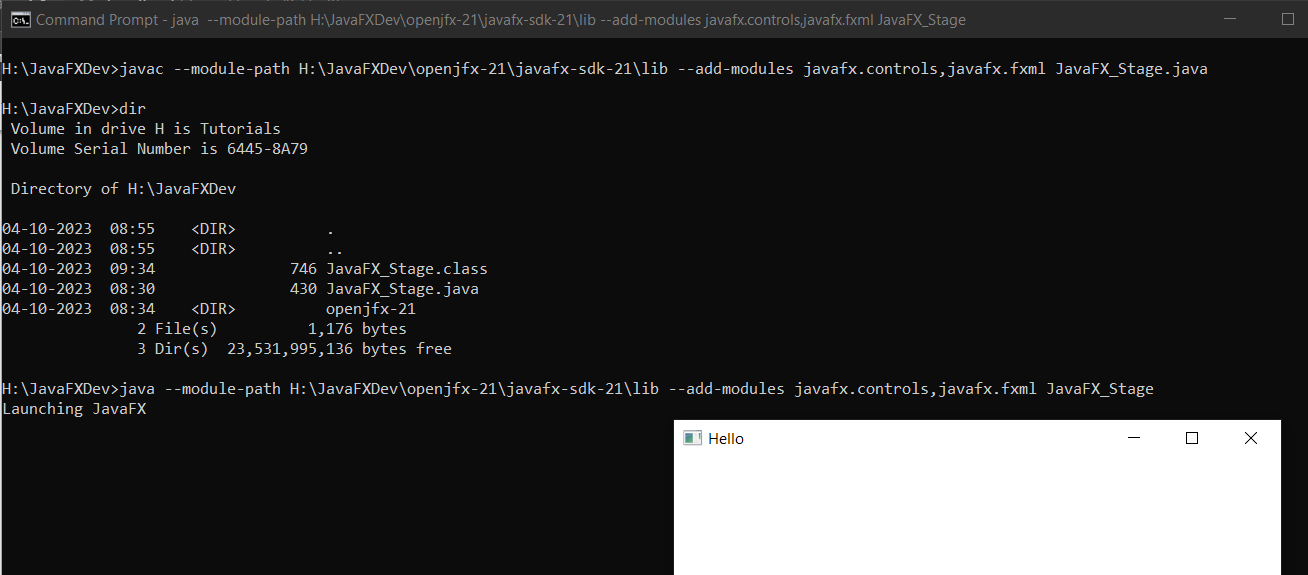
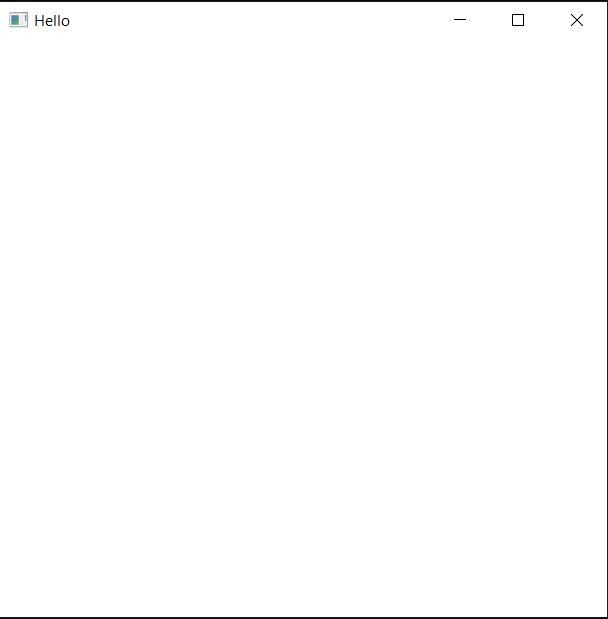
This would create a simple Hello Window as shown below
Creating basic widgets in JavaFX Platform
In this section we will learn to add a couple of widgets(controls) to our basic window and wire up code to take action. We will concentrate our efforts on the most commonly used item like
Labels
Buttons
Check Boxes
which are used for controlling items connected to your computer.
Our aim is to teach you enough so you can make simple cross platform javaFX control programs to communicate and control your Arduino Board, Raspberry Pi, Data Acquisition and logging Devices, Isolated USB relays, USB GPIO Boards etc.
JavaFX Stage and Scene
JavaFX Stage class is the top level JavaFX container. The primary Stage is constructed by the platform. JavaFX Stage can be considered the main window on which all other controls remain.
JavaFX Scene class is the container for all content in a scene graph.
It means that all the widgets like panes, buttons, checkboxes etc have to be attached to the scene object which in turn is attached to the Stage object as shown below.

Here is the partial code for doing so. 
The code above will not compile as the scene constructor is empty. You have to pass your widgets like pane or button to the Scene constructor to attach them to the scene.
Creating a Label in JavaFX
JavaFX Label control can display a text or image label inside a JavaFX GUI.Label is a non-editable text control. A Label is useful for displaying text that is required to fit within a specific space.
Partial code for creating a Label and setting its Font .
Label label = new Label("JavaFX Labels"); //Create a Label
label.setLayoutX(20); //Set X position of label
label.setLayoutY(20);
Font labelFont = new Font ("Arial",54.0); //Create a Font
label.setFont(labelFont); //Change Font of your label
// Add the label to a scene
Scene scene = new Scene(label);
label.setLayoutX(20) and label.setLayoutY(20) are used to position the label on the window.
After creation the Label had to be added to the scene and scene to the stage.
On running this you get

Creating a Simple Button in JavaFX
Let's create a simple button in javaFX and connect it with an event handler .The event handler will call a function which will print a message to the command line.
The basic steps involved in creating a button in javaFX are
Create a Button
Set the text on Button
Attach the button to an event handler
Attach the button to a pane
Attach the pane to scene
Attach the scene to stage
Show the stage
Add a function to handle the event generated by the button
- Log in to post comments